

How To Get Rid Of Publishing Date On Shopify Blog
As you might not know, you can take advantage of Shopify tools to publish a blog post on a specific date, automatically. For instance, you are going to launch a new product and you have already prepared a blog post for this event, however, you also have an important hangout, then it's time you need to learn how to set a specific publish date for a blog post so that your post will be published in time while you can still go out with your friends.
Related Posts:
- How to delete a blog post on Shopify
- How to allow or disable comments on a blog on Shopify
- How to add a post to your blog on Shopify
- How to add tags to a blog post on Shopify
- How to link to related posts on a blog in Shopify
- How to edit a blog name on Shopify
- How to edit the search engine listing for a blog on Shopify
That's the reason why I have prepared a step-by-step instruction on how to set a specific publishing date for a blog post to help you better manage your blog as well as save your time.
How to set a specific publishing date for a blog post
- Step 1: Select Blog posts
- Step 2: Click the post
- Step 3: Choose Set a specific publish date
- Step 4: Select a specific date and time to publish
- Step 5: Click Save
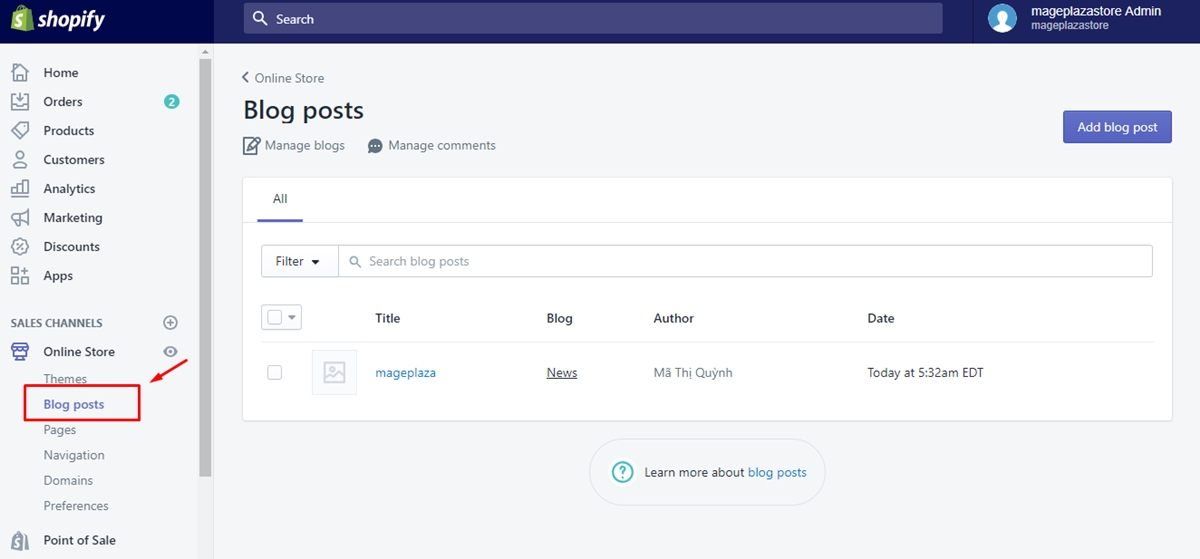
Step 1: Select Blog posts
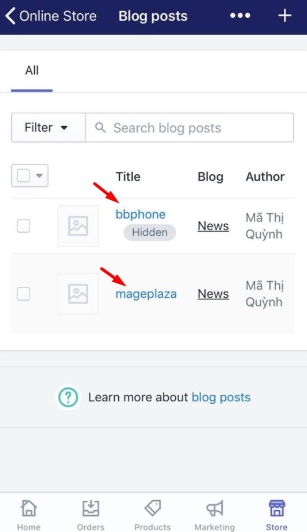
First and foremost, in your Shopify admin, you go to Online Store and then select the heading Blog Posts
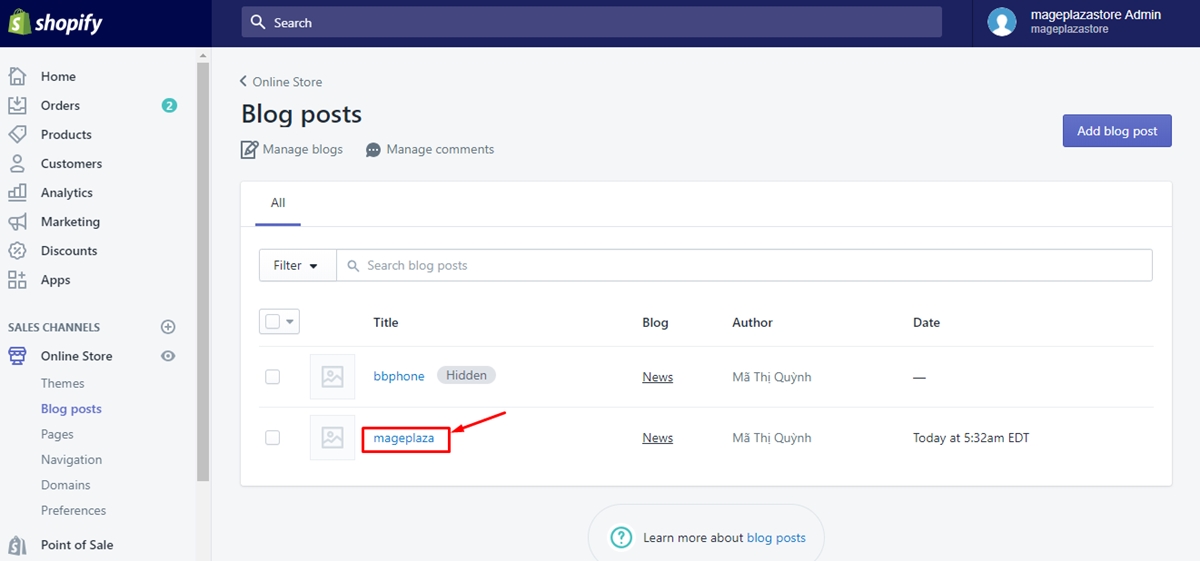
Step 2: Click the post you want to set a specific publishing date
In the interface of Blog posts, select the blog post that you want to set a specific publishing date for.
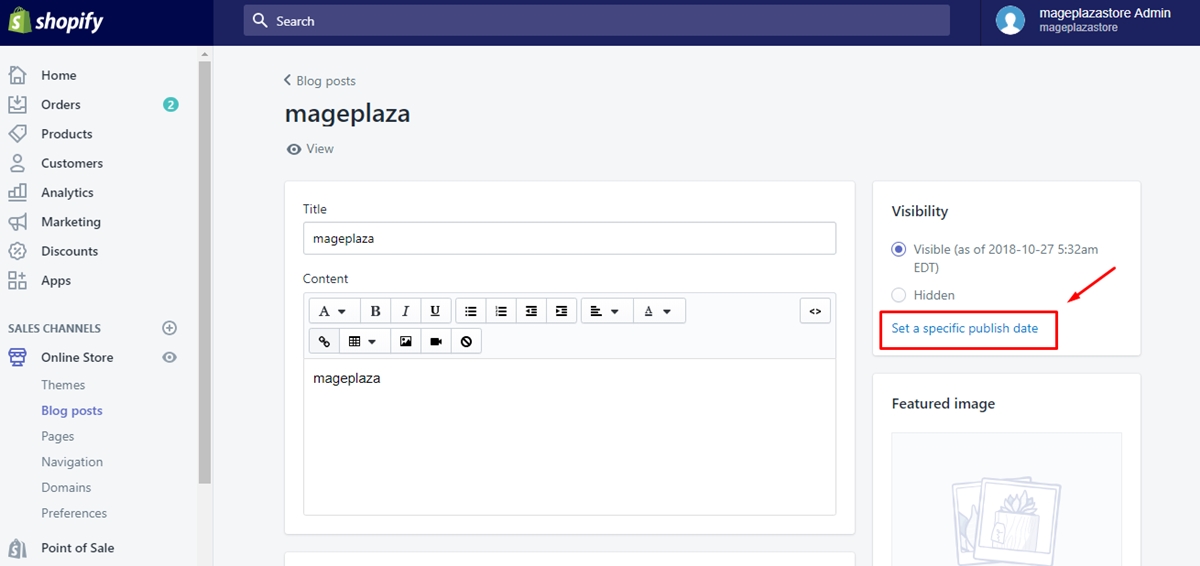
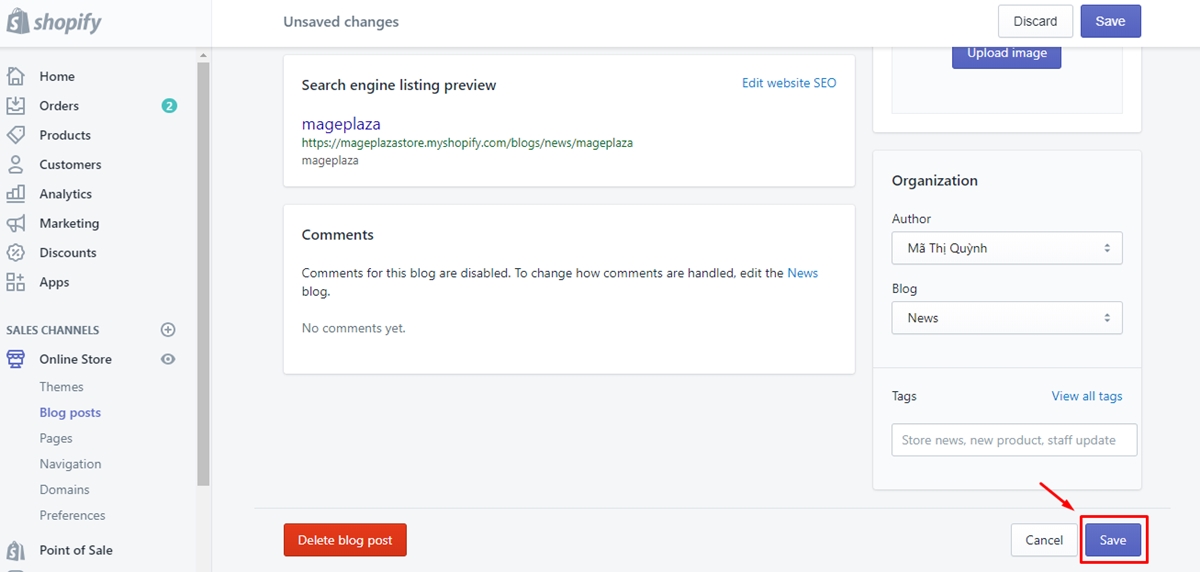
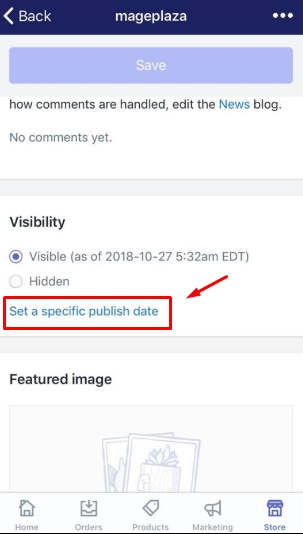
Step 3: Choose Set a specific publish date
After selecting the blog post, you will see Set a specific publish date under the section Visibility. Click on it.
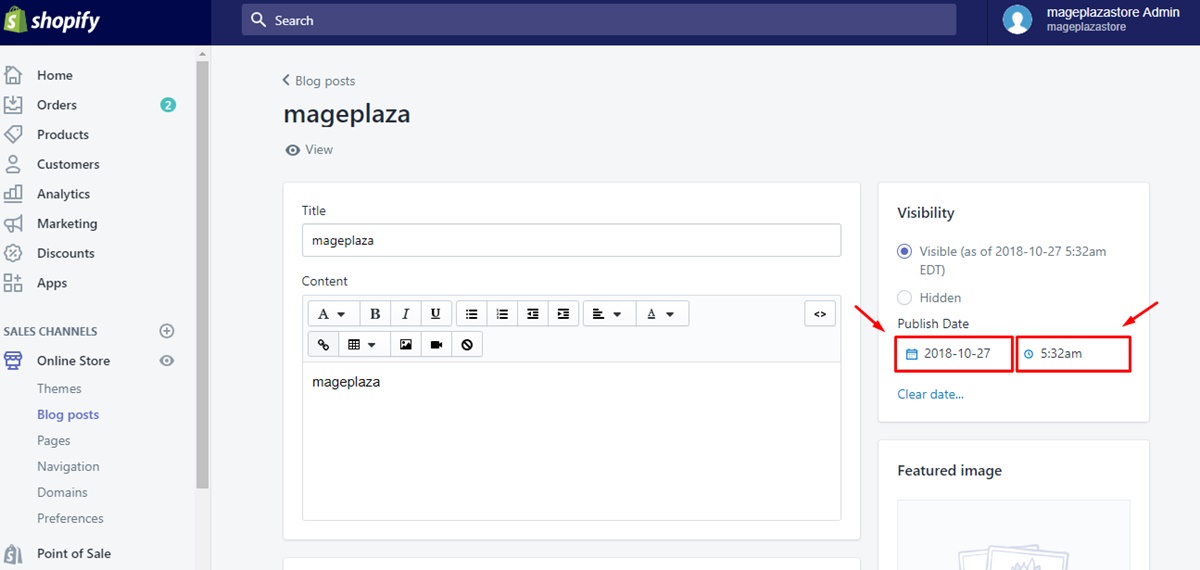
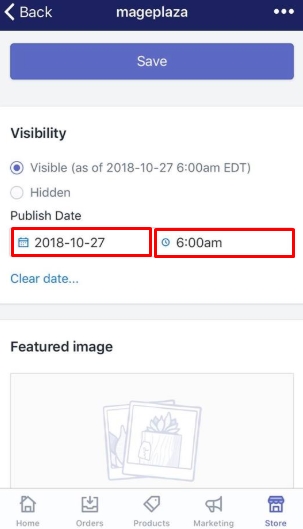
Step 4: Select a specific date and time to publish
Two fields will appear for you to choose the specific date and time you want to publish the post.
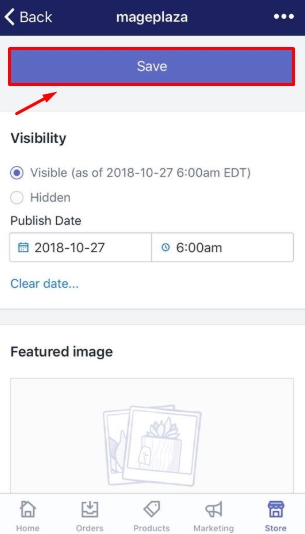
Step 5: Click Save
After you finish selecting date and time, click on Save button.
To set a specific publish date for a blog post on iPhone (Click here)
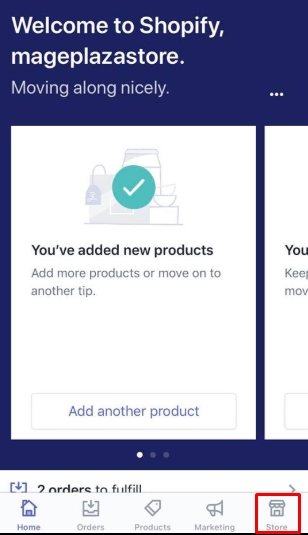
- Step 1: Tap
Store
The first thing you have to do is to open the Shopify app on your phone. Then, from the Shopify admin screen, tap Store.
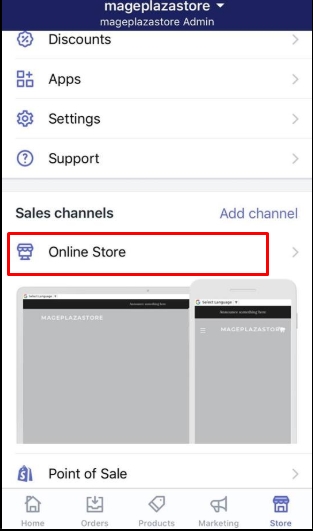
- Step 2: Select
Online StoreinSales channelssection
From the Sales channels section, you go to Online Store
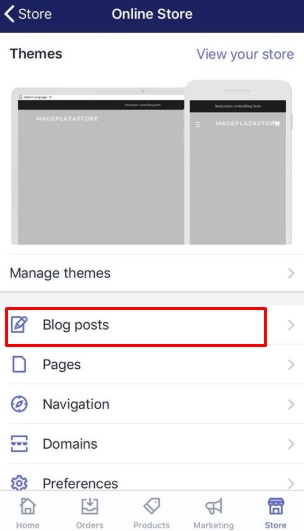
- Step 3: Choose
Blog posts
On Online Store screen, you tap Blog posts for the next step.
- Step 4: Tap the post you want to set a specific publishing date for
From the Blog posts, you will find a list of existing blog posts. Select the post that you want to set a specific publishing date for.
- Step 5: Choose
Set a specific publish date
Next, choose Set a specific publish date to continue
- Step 6: Set a publishing date and time
In this step, just select the publishing date and time that you want to set for the post
- Step 7: Tap
Save
Finally, tap Save to finish the process
To set a specific publish date for a blog post on Android (Click here)
- Step 1: Tap
Store
The first thing you have to do is to open the Shopify app on your phone. Then, from the Shopify admin screen, tap Store.
- Step 2: Select
Online StoreinSales channelssection
From the Sales channels section, you go to Online Store
- Step 3: Choose
Blog posts
On Online Store screen, you tap Blog posts for the next step.
- Step 4: Tap the post you want to set a specific publishing date for
From the Blog posts, you will find a list of existing blog posts. Select the post that you want to set a specific publishing date for.
- Step 5: Choose
Set a specific publish date
Next, choose Set a specific publish date to continue
- Step 6: Set a publishing date and time
In this step, just select the publishing date and time that you want to set for the post
- Step 7: Tap
Save
Finally, tap Save to finish the process
Conclusion
In short, with some simple steps on Shopify, you can set a specific publish date for a blog post without any difficulties. This will be very useful to give you a hand in managing your blog post as well as save your time. You don't have to stick to your laptop or mobile phone to edit a blog post anymore. We hope that you will find this writing interesting and helpful to you.
How To Get Rid Of Publishing Date On Shopify Blog
Source: https://avada.io/shopify/docs/how-set-specific-publish-date-blog-post.html
Posted by: garciathervice.blogspot.com
0 Response to "How To Get Rid Of Publishing Date On Shopify Blog"
Post a Comment